


Trong bài học này chúng ta sẽ xem xét vấn đề chuyển đổi dữ liệu (serialization) về các dạng binary, xml và json. Chúng ta sẽ vận dụng các kỹ thuật này để lưu trữ dữ liệu vào file theo các định dạng tương ứng sử dụng FileStream.
Để thực hiện bài thực hành này, bạn cần biết: Kiến trúc stream và cách sử dụng FileStream; Khái niệm và cách thức thực hiện serialization.
Thực hành 1: Sử dụng binary serialization để lưu trữ dữ liệu trong file nhị phân
Bước 1. Xây dựng class BinaryDataAccess
Trong thư mục DataServices tạo file mã nguồn BinaryDataAccess.cs cho lớp BinaryDataAccess và viết code cho lớp BinaryDataAccess như sau:
using System.Collections.Generic;
using System.IO;
using System.Runtime.Serialization.Formatters.Binary;
namespace BookMan.ConsoleApp.DataServices
{
    using Models;
    public class BinaryDataAccess
    {
        public List<Book> Books { get; set; } = new List<Book>();
        private readonly string _file = "data.dat";
        public void Load()
        {
            if (!File.Exists(_file))
            {
                SaveChanges();
                return;
            }
            using (FileStream stream = File.OpenRead(_file))
            {
                BinaryFormatter formatter = new BinaryFormatter();
                Books = formatter.Deserialize(stream) as List<Book>;
            }
        }
        public void SaveChanges()
        {
            using (FileStream stream = File.OpenWrite(_file))
            {
                BinaryFormatter formatter = new BinaryFormatter();
                formatter.Serialize(stream, Books);
            }
        }
    }
}
Ở bước này chúng ta sử dụng BinaryFormatter để thực hiện serialization thẳng vào một FileStream, cũng như deserialization từ FileStream, thay cho biến đổi về mảng byte như trong ví dụ ở phần trước.
Bước 2. Điều chỉnh lớp Book
using System;
namespace BookMan.ConsoleApp.Models
{
    /// <summary>
    /// Lớp mô tả sách điện tử
    /// </summary>
    [Serializable]
    public class Book
    {
        private int _id = 1;
        /// <summary>
        /// số định danh duy nhất cho mỗi object
        /// </summary>
        public int Id
        {
            get { return _id; }
            set { if (value >= 1) _id = value; } // id chỉ nhận giá trị >= 1
        }
...
Ở bước này chúng ta thêm attribute [Serializable] cho lớp Book.
Attribute này là bắt buộc để BinaryFormatter có thể hoạt động. Attribute này cho phép BinaryFormatter truy xuất các thành viên của lớp Book để sử dụng trong quá trình serialization. Nếu thiếu attribute này, ở giai đoạn runtime sẽ báo lỗi (nhưng ở giai đoạn compile time sẽ không báo lỗi gì).
Bước 3. Điều chỉnh lớp Repository
public class Repository
{
    protected readonly BinaryDataAccess _context;
    public Repository(BinaryDataAccess context)
    {
        _context = context;
        _context.Load();
    }
...
Ở bước này chúng ta thay SimpleDataAccess bằng BinaryDataAccess vừa tạo.
Bước 4. Điều chỉnh lớp BookController và ShellController
internal class BookController : ControllerBase
{
    protected Repository Repository;
    public BookController(BinaryDataAccess context)
    {
        Repository = new Repository(context);
    }
internal class ShellController : ControllerBase
{
protected Repository Repository;
public ShellController(BinaryDataAccess context)
{
Repository = new Repository(context);
}
Ở bước này chúng ta cũng thay SimpleDataAccess bằng BinaryDataAccess.
BBổ sung phương thức sau vào ShellController
public void Save()
{
    Repository.SaveChanges();
    Success("Data save!");
}
Bước 5. Điều chỉnh phương thức ConfigRouter
private static void ConfigRouter()
{
    BinaryDataAccess context = new BinaryDataAccess();
    BookController controller = new BookController(context);
    ShellController shell = new ShellController(context);
    Router r = Router.Instance;
Tương tự hai bước trên, ở đây chúng ta cũng thay SimpleDataAccess bằng BinaryDataAccess.
Bổ sung route sau vào ConfigRouter
r.Register(route: "save shell",
    action: p => shell.Save(),
    help: "[save shell]");
Bước 6. Dịch và chạy thử chương trình
Dịch và chạy thử với các lệnh: Add shell ? path = <value>, Save shell
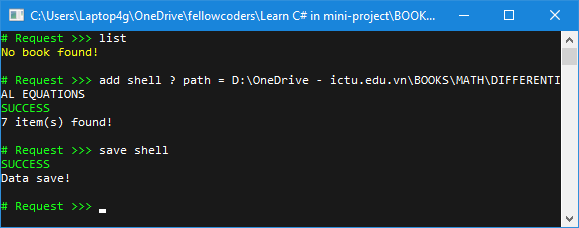
add shell và save shellThực hành 2: sử dụng xml
serialization để lưu trữ dữ liệu trong file xml
Trong thư mục DataServices tạo file mã nguồn XmlDataAccess.cs cho lớp XmlDataAccess. Code cho lớp XmlDataAccess như sau:
using System.Collections.Generic;
using System.IO;
using System.Xml;
using System.Xml.Serialization;

namespace BookMan.ConsoleApp.DataServices
{
    using Models;
    public class XmlDataAccess
    {
        public List<Book> Books { get; set; } = new List<Book>();
        private readonly string _file = "data.xml";
        public void Load()
        {
            if (!File.Exists(_file))
            {
                SaveChanges();
                return;
            }
            var serializer = new XmlSerializer(typeof(List<Book>));
            using (var reader = XmlReader.Create(_file))
            {
                Books = (List<Book>)serializer.Deserialize(reader);
            }
        }
        public void SaveChanges()
        {
            var serializer = new XmlSerializer(typeof(List<Book>));
            using (var writer = XmlWriter.Create(_file))
            {
                serializer.Serialize(writer, Books);
            }
        }
    }
}
Để chạy thử nghiệm có thể lặp lại bước 3, 4, 5 như trong phần thực hành 1 để thay BinaryDataAccess bằng XmlDataAccess.
Thực hành 3: sử dụng json serialization để lưu trữ dữ liệu trong file json
Trong thư mục DataServices tạo file mã nguồn JsonDataAccess.cs cho lớp JsonDataAccess.
Code cho lớp JsonDataAccess như sau:
using Newtonsoft.Json;
using System.Collections.Generic;
using System.IO;
namespace BookMan.ConsoleApp.DataServices
{
    using Models;
    public class JsonDataAccess
    {
        public List<Book> Books { get; set; } = new List<Book>();
        private readonly string _file = "data.json";
        public void Load()
        {
            if (!File.Exists(_file))
            {
                SaveChanges();
                return;
            }
            JsonSerializer serializer = new JsonSerializer();
            using (StreamReader sReader = new StreamReader(_file))
            using (JsonReader jReader = new JsonTextReader(sReader))
            {
                Books = serializer.Deserialize<List<Book>>(jReader);
            }
            //var jsonString = File.ReadAllText(_file);
            //Books = JsonConvert.DeserializeObject<List<Book>>(jsonString);
        }
        public void SaveChanges()
        {
            JsonSerializer serializer = new JsonSerializer();
            using (StreamWriter sWriter = new StreamWriter(_file))
            using (JsonWriter jWriter = new JsonTextWriter(sWriter))
            {
                serializer.Serialize(jWriter, Books);
            }
            //var jsonString = JsonConvert.SerializeObject(Books);
            //File.WriteAllText(_file, jsonString);
        }
    }
}
Để chạy thử nghiệm có thể lặp lại bước 3-4-5 như trong phần thực hành 1 để thay BinaryDataAccess bằng JsonDataAccess.
Kết luận
Trong bài này chúng ta tập trung chính vào phương pháp làm việc với file và cách thức biến đổi dữ liệu (serialization). Chúng ta thấy rằng cơ chế làm việc với các nguồn dữ liệu (nói chung) và file (nói riêng) trong .NET framework rất thống nhất.
.NET framework cũng hỗ trợ việc chuyển đổi dữ liệu tự động với nhiều loại định dạng khác nhau, như nhị phân, xml, json.
Thông qua phần thực hành chúng ta đã xây dựng 3 lớp khác nhau để hỗ trợ lưu trữ dữ liệu vào file nhị phân, file xml và file json.
Ở bài tiếp theo chúng ta sẽ xem xét một tính năng khác của C# và .NET framework để có thể dễ dàng chuyển đổi qua lại giữa các loại dữ liệu này.
+ Nếu bạn thấy site hữu ích, trước khi rời đi hãy giúp đỡ site bằng một hành động nhỏ để site có thể phát triển và phục vụ bạn tốt hơn.
+ Nếu bạn thấy bài viết hữu ích, hãy giúp chia sẻ tới mọi người.
+ Nếu có thắc mắc hoặc cần trao đổi thêm, mời bạn viết trong phần thảo luận cuối trang.
Cảm ơn bạn!


: xuất nhập, view, controller")
")
Chuỗi bài hay quá. Cám ơn nhiều.